sfc / scannow es la gran herramienta de command lineThe command line is a textual interface that allows users to interact with the operating system using written commands.. Unlike graphical interfaces, where icons and menus are used, The command line provides direct and efficient access to various system functions. It is widely used by developers and system administrators to perform tasks such as file management, network configuration and.... que funciona muy bien cuando su PC necesita reparar archivos de sistema dañados o corruptos. Despite this, can get Windows Resource Protection was unable to start the repair service Error trying to run sfc command / scannow. Here, in this post, I will walk you through how to fix Windows resource protection failed to start repair service error in Windows 10/8/7, Vista and Windows Server.
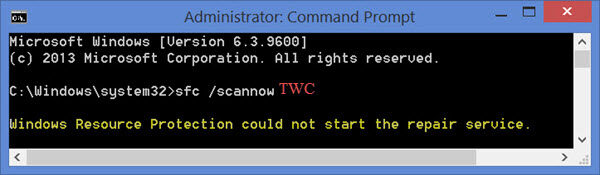
You may receive the following error message when sfc / scannow does not repair system files.
SFC System File Checker cannot repair corrupted member file
O,
Windows Resource Protection found corrupt files but was unable to repair some of them
O,
System File Checker does not work, does not run or cannot be repaired.
Cause:
This error mainly occurs when Windows module installation services do not start. In this post, I'll tell you 2 methods to start this service.
Method 1: using the command line
Steps 1: Open Command prompt as administrator. Ir Start menu, and look for Command and, when the result appears, right click on it and select Execute as an administrator.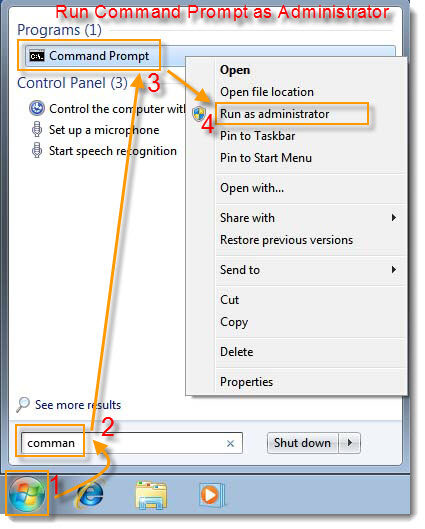
Paso 2: Type the following command and hit enter. When the commands are executed successfully, will return it to a message “SUCCESS”.
sc config trustedinstaller start= auto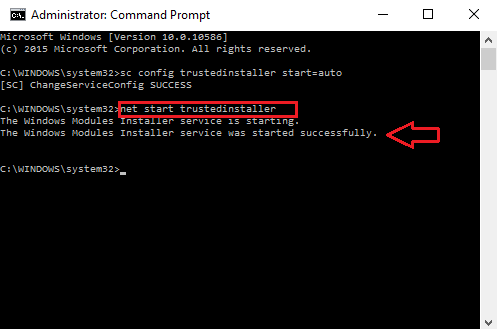
Paso 3: Now, type the following command and press Enter.net start trustedinstaller
That's all. Now you can run the sfc command / scannow without getting an error. Yes even then, you get the same error or another error message, You can use the next alternative tool to fix the error Windows Resource Protection could not start repair service.